
Edit Your Book Faster with This 3-Step System
Cut Months Off Your Editing Process Without Sacrificing Quality

This post is sponsored by ProWritingAid. Some outbound links are part of an affiliate program where I’m compensated for any sales made. This doesn’t affect your cost and greatly helps support this Substack. Thanks for your understanding!

This question came from one of my viewers recently, and it’s an excellent question:
Hey, I was wondering what’s your current process for editing? Especially copy editing.
This is the first book I ever wrote and published in 2014 (show onscreen). And here’s a book I’ll be publishing in July 2026 (show onscreen). Between those two books are twelve years of writing, editing, and publishing well over fifty books, plus hundreds of blog posts and video scripts.
If you were to visit my Goodreads page, you’ll see over 105 distinct works, including translations and multiple new editions.
Over that time, I’ve worked with several editors who helped shape me into the author I am today. But I don’t rely solely on editors to clean up my book, much less my raw first draft. Professional editing costs money, and sending messy work wastes everyone’s time.
So before anything ever hits an editor’s inbox, I clean it up myself.
Over the years, I’ve refined a 3-step system that makes that process faster, freeing me up to focus on other aspects of my author business. In fact, I’ve used this same process to bang out a clean manuscript in two days. While I cannot guarantee you’ll fully edit an epic-length novel in that time, the tricks and tools I share will certainly cut down costs and save you time in the long run.
Don’t be mistaken, this 3-step process isn’t one-and-done. I use it at every stage, from developmental edits to final proofreading. First, let’s discuss those three steps, then we’ll explore how they function at the various editing stages of your book.
Step 0: Finish the Book
I’m not trying to dispense advice that’s universally applicable because all authors have their own distinct styles they want to use. But, we can all agree that you cannot edit a blank page.
So my 3-step editing system will not work if you haven’t even finished the book. And, I wouldn’t recommend using it if your manuscript is only partially finished. I know many authors who prefer editing while they’re writing, but I don’t agree with this split focus approach.
Instead, finish the book completely, even if it’s imperfect. When you go through all stages of editing, you’ll be able to fix some of those nagging issues or problems that cropped up in the first draft. Till then, wrap that book up and then worry about cleaning it up.
Again, it’s about saving time, so you can move onto the next step in your book’s lifecycle.
Step 1: Quick Clean Up
Once I have a complete first draft, I usually give myself at least a day, but often prefer up to two weeks. This separation helps reset my mind and has me approaching my manuscript in a more objective fashion.
I’ve found when I edit immediately after writing a book, I tend to be a little too harsh on the work, or I’ll try to unnecessarily rework perfectly fine sentences or paragraphs.
You’ll have to judge how much distance you need once you’ve had plenty of reps in writing several books. For now, consider at least a day to two weeks as your respite before diving into the first step.
I keep this first step absolutely easy. Since I wrote most of my earlier books in Microsoft Word, I use the Editor function. But, I don’t bother with the deep level edits since I don’t find the grammar checks very useful. All I’m looking out for are typos and wrong word choice. I ignore the rest of the suggestions.
This step takes me about ten to fifteen minutes in a 30,000-word manuscript. When I say “quick clean up”, I mean I do not bother with anything beyond just small, surface level issues.
With each phase of editing, this step becomes faster and easier since you and your editor will be sorting out the issues and identifying the tiny problems.
Could you skip this step and go right into the next? Sure, but I find this is a great way for me to ease my way into the editing process. Rather than diving into the deep end of the pool, I start at the shallow end and slowly wade my way out.
I like to list common misspellings or misused words, having it function as part of my personal style guide.
Side note: A style guide is a set of rules that keeps your writing consistent in spelling, punctuation, formatting, and voice.
Once you’ve burned through this first step, it’s time to kick it up a notch.
Step 2: Style & Clarity Editing
Once I’m warmed up, I dig deeper into the manuscript to focus on style and clarity, tightening sentences, improving flow, and cutting anything that slows the reader down.
At this stage, I’m looking for friction. For instance, I’m going to watch out for:
Sentences that feel clunky
Paragraphs that drag
Repetition that sneaks in without me noticing
Weak phrasing, passive voice, and sections where the rhythm feels off.
Nothing here is technically broken, but it can absolutely wear a reader down if I leave it unchecked.
You can do this manually, and you should get better at spotting these issues over time, especially if you work with a pro editor. But there’s one problem—you already know what you meant to say, so your brain fills in the gaps. That makes it easy to overlook awkward sentences, repeated words, and patterns that weaken your writing. What reads fine to you may not read well to someone else.
That’s why I lean on tools to speed this part up and catch what I miss.
For the past eight years, I’ve used ProWritingAid to dial this part in.
The main place I use ProWritingAid in this step is the Realtime Report. This is where I’m working through issues as they appear, not just grammar, but passive voice, awkward phrasing, and sentence structure problems. On one pass, I ran a roughly 40,000-word manuscript through it and got hit with over 1,000 suggestions.
That might sound overwhelming, but it’s actually manageable. I can usually work through about 100 issues per hour, so this pass took about ten hours.
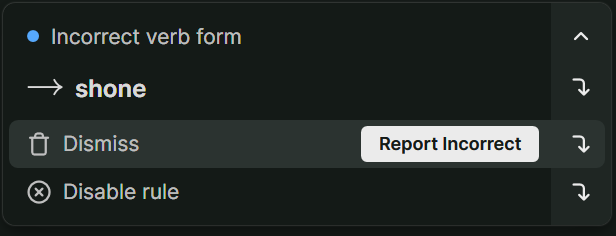
To be clear, some issues will be false positives, and that’s fine. If it doesn’t fit your voice, you can dismiss it and move on. If something looks off in the tool itself, you can report it. Hover over Dismiss, click Report Incorrect, and leave feedback. They do pay attention, and it helps improve future suggestions.
You’re also in control the entire time. If a rule keeps flagging something that doesn’t apply to your writing, you can disable it so it stops showing up. That way, you’re not fighting the tool. Instead, you’re shaping it to match your writing preferences.
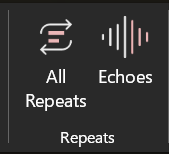
Beyond that, I’ll run a few targeted reports based on my known weak spots. Repeats is a big one for me, both All Repeats and Echoes, since I tend to reuse words more than I should. All Repeats shows me repeated words and phrases across the entire document, while Echoes focuses on those close-range repeats that pop up too near each other. Between the two, I can quickly spot patterns and clean them up before they start dragging down the writing.
I also lean on readability and style suggestions to catch areas where sentences get too dense or the flow starts to break down. These reports help me spot patterns I wouldn’t catch on my own, especially after staring at the same manuscript for hours.
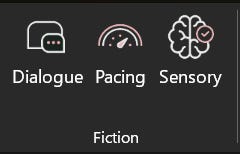
And for those of you fiction authors out there, you’ll love some of their features including the Sensory report that helps you add more immersive details without overdoing it. You’ll also find tools like Dialogue, which flags weak or overused dialogue tags and phrasing, and the Pacing report, which helps you spot sections that drag or move too fast so your story flows better. These tools are merely scratching the surface of what all you can do to level up your fiction work.
What I like about this approach is it doesn’t fully replace my judgment, but supports and enhances it. I’m still making the final call on every change, but I’m doing it with a better idea of what’s actually happening on the page. By the time I’m done with this step, the writing is tighter, clearer, and far easier to read, which makes everything that comes next much smoother.
Use this same process on your writing when you get access to ProWritingAid’s Free Plan at DaleLinks.com/EditLikeAPro. This includes grammar, spelling, and punctuation checks, plus style suggestions that help clean up awkward sentences, tighten your writing, and improve clarity. You can also run reports on up to 500 words at a time, including readability, consistency, and repeats, which makes it easier to spot and fix problems before they spread across your manuscript.
Even on the free plan, you’ll start to see where your writing drags, where you’re repeating yourself, and where things need tightening.
The best news is when you’re ready to upgrade, ProWritingAid will give you 10% off any annual plan when you use my affiliate link and the coupon code DALE10.
Step 3: Text-to-Speech
Now that I’ve handled all the minor clean-up with a basic grammar checker and the deeper issues with ProWritingAid, I move onto the most labor-intense portion of the editing process: text-to-speech (TTS).
This is where I stop reading and start listening.
When you read your own work, your brain fills in gaps and smooths over mistakes. But when you hear it out loud, all the problems become much more obvious. Awkward phrasing, repetition, and clunky sentences all come through—quite literally—loud and clear.
I run the entire manuscript through text-to-speech and follow along line by line. If something sounds off, I stop and fix it immediately. Sometimes it’s a single word. Other times it’s a full sentence that needs to be rewritten.
Once I fix the mistake, I’ll start the TTS before the corrected sentence so I hear how it lays out. Do NOT skip this step because you might accidentally create more issues (i.e., typos, missed words, etc.).
This step takes time... a lot of time! But it’s one of the most effective ways to catch issues that would otherwise slip through every other pass.
Listening to your manuscript also helps with pacing. You can hear when a paragraph drags or when a section moves too fast. You’ll feel the rhythm of the writing in a way you just can’t when reading in your head or reading it out loud yourself.
I actually picked this up from working with audiobook narrators. They were often my unintended last line of defense, catching mistakes I completely missed just by hearing the text.
Microsoft Word has a built-in text-to-speech option that I like to use, but you can also try tools like ElevenLabs, Speechify, or even your browser’s read-aloud feature in Edge or Chrome. The key is simple: if it doesn’t sound right, it needs to be fixed.
By the time I finish this step, the manuscript reads well AND sounds right too. That makes a huge difference for the reader.
But we’re not done yet. I know I said this is a 3-step process, but there’s another layer to how this actually works.
Applying the 3-Step Process Across All Stages of Editing
Now here’s where most authors get this wrong.
They treat editing like a one-time event instead of a layered process. But if you want a near-flawless, showroom-ready manuscript, that’s not how this works. This 3-step system isn’t something you run once and call it done. You repeat it at every stage, and how you use it changes depending on where you are.
Right after the first draft, I run all three steps. That pass is about cleaning up obvious issues, tightening the writing, and making sure I’m not handing off a messy manuscript.
From there, I send it to my editor for developmental and structural editing. This is the big-picture stage. We’re looking at organization, clarity, flow between sections, what needs to be expanded, and what needs to be cut. If something isn’t working at a foundational level, this is where it gets fixed.
Once I get that feedback, I run the 3-step process again. This pass cleans up anything that cropped up during revisions and tightens the writing before moving on.
At this point, I may bring in beta readers. This is where you get real-world feedback from actual readers, not just technical edits. They’ll tell you if something feels off, where the pacing drags, or if a section just doesn’t land the way it should. I use different beta readers depending on what I’m writing, whether that’s sci-fi horror or nonfiction. They’ll catch issues, but more importantly, they’ll tell you when the train has run off the tracks.
Side note: Some authors skip developmental and structural editing in lieu of beta readers. I don’t recommend that, but it does happen because it’s far more affordable. Some beta readers are free, and even paid ones cost a fraction of what a professional editor charges for big-picture edits.
After working through their feedback, I run the 3-step process again. Now I’m refining the content based on real reader reactions and tightening anything that still feels wonky.
Then the manuscript goes back to my editor for line and copy edits—where the focus shifts from structure to execution. Line editing improves flow, tone, and readability at the sentence level, while copyediting handles grammar, consistency, and technical accuracy. This is where the manuscript really starts to feel polished.
Once I get my book back, I run the 3-step process again. By this point, I often skip the first step since the basics are already handled, but I still go through ProWritingAid and text-to-speech to make sure everything reads and sounds right.
Finally, it goes through proofreading. This is the last line of defense, catching any remaining typos, formatting issues, or small errors before publication.
And yes, I run the 3-step process one more time after that. Again, I may skip the first step.
If you want to make sure nothing slips through, run all three.
To be clear, this is my deepest editing workflow. Sometimes my editor feels the manuscript is strong enough to move straight into line and copy edits, foregoing developmental and structural edits. That’s specific to me and won’t apply to everyone. Talk with your editor and figure out what makes the most sense for your current skill level.
What works for you in your editing process right now? There’s no wrong answer; I’m always eager to hear everyone else’s approach.
Final Thoughts
Want to see the secret weapon that analyzes readability, pacing, structure, and hidden patterns across your entire manuscript? And I’m not talking about the Realtime Report. Check out this video 👇, where the team at ProWritingAid breaks down one of their most powerful tools, the Manuscript Analysis report. I recently added it as a fourth step in my editing workflow and have been blown away by the results. See you there.
I love this! ProWritingAid is something I have used for years, but I keep hearing everyone say they read their words. I am dyslexic and know that I will 100% read what I meant to write and not what I wrote. I use text-to-speech for that step. Dabble has a nice built-in version.
As always thanks for the great info. It was nice to see someone else's process. I have mentally been making things other people do to edit a lot harder in my head than this. 😅 This I can do.
Hello. Very handy article. If I may, where do you find your beta readers? In the past, I've usually just relied on my editors for feedback.